Basic Cable Beanie

MATERIALS:

YARN

  • DK weight yarn (11 wpi)
  • Yardage required- 150 – 300 yards (137 – 274 m)

Yarn used in the sample:

Vardhman Soft n Smart – 1(2,2) ball in colourway SSH027


NEEDLES

  • US #4 / 3.5mm 16” circular needle or DPNs
  • US #6 / 4.00 mm 16” circular needle and/or DPNs

This hat is knit in the round from brim to crown with short circular needle. Change to double pointed needles when necessary.

Alternatively, you can use the magic loop technique to knit in the round using a single long circular needle. In that case, you will need circular needle 80 cm in each size.

NOTIONS

  • Stitch markers
  • Measuring Tape
  • Scissors
  • Tapestry needle to weave in the ends

GAUGE

Approximate: 22 stitches and 30 rows =10 cm/ 4” x 4” of stockinette stitch

FINISHED SIZE: 

The pattern includes the following sizes, which are referred to in this order: S (M, L)
Fits head size: Approx. 21(23, 25) inches.

 To make your hat smaller or larger, your CO number must be divisible by 12

ABBREVIATIONS

  • K: Knit
  • P: Purl
  • Sl St: slip stitch
  • Dec:  decreased
  • DPNs: double pointed needles
  • C6B: Cable 6 Back
  • k2tog: knit 2 stitches together
  • SSK: Slip 2 sts, knit the slipped sts together
  • P2tog:  purl 2 stitches together
  • PM:  place marker
  • SM: slip marker
  • st(s): stitch(es)

PATTERN STITCHES

1. 2×2 Rib in the Round

Multiple of 4

R1: *knit 2, purl 2; repeat from * to the end of the round
R2 and all other rounds: knit the knit stitches and purl the purl stitches

2. Cable 6 Back (C6B):

Knit on 6 stitches

Step 1: Slip 3 stitches (purl-wise) on to the cable needle

Step 2: Place cable needle in BACK of your work.

Step 3: Knit the 3 stitches from your regular needle

Step 4: Slip the 3 stitches from the cable needle back on your left needle and knit.

INSTRUCTIONS

Using smaller needles, cast on 108(120, 132) sts. PM and join for working in the round, being careful not to twist the cast-on.

RIBBED BRIM

Establish ribbing: [K2, P2] around.                                                                                                                              

Work in 2×2 ribbing as established for 1-1.5”.

MAIN BODY OF THE CAP

Change to larger needles

R1-6: * Knit 6 purl 2 knit 2 purl 2 *repeat.

R7: *C6B, P2, K2, P2* repeat.

Repeat Round 1-7, 5(6,7) times. End with round 7.

Crown Decrease

Switch to double pointed needles when there are too few stitches to work comfortably on circular needles.

R1: *K2, SSK, K2, P2, K2, P2*. Repeat all around.

R2: *K5, P2, K2, P2*. Repeat all around.

R3: *K2, K2tog, K1, P2, K2, P2*. Repeat all around.

R4: *K4, P2, K2, P2*. Repeat all around.

R5: * K1, SSK, K1, P2, K2, P2*. Repeat all around.

R6: *K3, P2, K2, P2*. Repeat all around.

R7: *K1, K2tog, P2, K2, P2*. Repeat all around.

R8: *K2, P2, K2, P2*. Repeat all around.

R9: *SSK, P2, K2, P2*. Repeat all around.

R10: *K1, P2, K2, P2*. Repeat all around.

R11: *P2tog, P1, K2, P2*. Repeat all around.

R12: *P2, K1, SSK, P1*. Repeat all around. All

R13: *P2tog, K2, P1*. Repeat all around.

R14: P1, *K2, P2tog*. Repeat the stitches between*all around until 1 stitch before BOR.

R15: P2tog with last stitch from R14 and 1st stitch from R15. K2, P2tog. All around

R16: K2tog, P1, all around

R17: K2tog all around

FINISHING

Cut yarn, leaving an 8” tail. Using a tapestry needle, thread tail through the remaining live sts and pull to close top of hat. Weave in ends and block your hat.

 To block, soak in warm water and mild soap, reshape and lay flat to dry. Weave in all loose ends

Copyright Info: The pattern and photographs are the property of the designer Amrita Sharma. This pattern is for personal, non-commercial use only. You can sell the items made with this pattern on a small scale (e.g., Handmade to order or sold at fairs etc). Mass production of items using this pattern is not allowed without my written approval.

Posted in Free Knitting Patterns, Knitting | Leave a comment

Raindrops Wrap

MATERIALS:

YARN

  • Aran (heavy worsted) weight yarn (8wpi)

666 meters/ 728 yards

Pattern uses approximately 400 g

  • Yarn used in the sample:

Red Heart Super Saver- 2 balls of colourway Redwood


NEEDLES AND HOOKS

  • 6.0 mm Knitting needles, US Size 10, (straight or circular as per your preference)
  • 6.0 mm crochet hook, US size J
  • Measuring Tape
  • Scissors
  • Tapestry needle to weave in the ends

Gauge:
Approximate: 14 sts & 17 rows in 4” x 4” of stockinette stitch (gauge not important for this pattern)

FINISHED SIZE: 

One size but easily customizable. Approximately 18” X 88”

NOTE: The wrap is knit flat as a basic rectangle.  So, you can use either regular straight needles or circular needles as per your choice. I prefer circular needles as they can hold all stitches comfortably You can easily make the wrap wider or narrower by casting on more or fewer stitches as per directions given in the pattern. To make it longer, simply knit for more rows while following the stitch pattern.

Size can also be adjusted by changing either yarn weight or needle size. But this will change the yardage of the yarn.  

ABBREVIATIONS

  • K: Knit
  • P: Purl
  • Sl St: slip stitch purl wise
  • SC: single crochet

PATTERN STITCHES

Multiple of 4+3

R1: (RS) K1, P1, (K3, P1) repeat, K1

R2: (WS) P all stitches

R3: (K3, P1) repeat, K3

R1: K all stitches

R2: K all stitches

First stitch of each row will be a selvedge stitch to give a neat edge to the knitted scarf. If you opt for the optional crochet edge, Selvedge stitches make it easier to pick up and crochet into the stitches.

Selvedge stitch: Sl1Pwyif Yb

Sl1Pwyif: Slip one stitch purl wise with yarn in front of work.

Yb = Bring yarn to back of work

CHART

 Chart for the 4 stitch and 4 row Raindrops pattern repeat shown in red border.

Selvedge stitch + Garter stitch edge can also be seen on both the sides of the pattern.

Raindrops Wrap

Knitting Pattern Instructions

CO 65 stitches.

BORDER

K 6 rows in Garter stitch. Remember that the first stitch will be selvedge stitch

Row 1-6: Sl1Pwyif yb, knit all stitches

MAIN BODY OF THE WRAP

Note: First stitch of every row will be selvedge stitch. There will be a 3-stitch garter edge on both sides of the wrap. Odd rows are the right side of the wrap and even rows are the wrong side.

SET-UP ROW: Sl1Pwyif yb, K2, P to the last 3 stitches, K3.

ROW 1: Sl1Pwyif yb, (K3, P1) repeat to the last 4 stitches, K4.

ROW 2: Sl1Pwyif yb, K2, P to the last 3 stitches, K3.

ROW 3: Sl1Pwyif yb, K5, (P1, K3) repeat to the last 6 stitches, K6.

ROW 4: Sl1Pwyif yb, K2, P to the last 3 stitches, K3

Repeat Row 1-4 until the scarf measures your desired length. In the sample, the pattern as repeated until the scarf measured approximately 85 inches in length.

BORDER

K 6 rows in Garter stitch so that you get 3 ridges on the right side of the wrap. Remember that the first stitch will be selvedge stitch

Row 1-6: Sl1Pwyif yb, knit all stitches.

Cast off.

CROCHET EDGE (Optional)

Picking up one stitch in each of the selvedge edge stitch, do 3 rows of SC along the long edge of the wrap. 

Posted in Uncategorized | Tagged , | Leave a comment

Speedy Slouchy Hat – Free Crochet Pattern

I am excited to share with you this free crochet pattern of a slouchy beanie. Slouchy beanie are fun to crochet as they are in style these days.

It’s a beginner friendly pattern that is superfast to work up. I have named this hat “Speedy”for the reason that it is ……well, speedy! duh!!!

Crocheted almost entirely in double crochet and using bulky yarn Zebra by Ganga acrowools it takes but few hours to work this up.

MATERIALS

YARN: Bulky yarn 7 wpi. I have used Zebra by Ganga Acrowool in the colorway PTT1423

HOOK: 8 mm

GAUGE: 9 stitches or 7 rows in 4 inches or 10 cm

 ABBREVIATIONS

CH- Chain Stitch

HDC-Half Double Crochet

SC- Single Crochet

st/ sts- stitch/ stitches

sl st: Slip stitch


PATTERN

IMORTANT NOTE: All rounds are joined in the first DC, HDC or SC made and not the beginning chain. Beginning chain 2 or 1 does not count as a stitch.

Make a Magic Ring to start . Alternatively, you can do CH 2 and start the Round 1 in second chain from the hook.


ROUND 1: CH 2, DC 12 times in ring. sl st to 1st DC to join. (12 sts) ROUND 2: CH 2, 2DC in same st and around. sl st to 1st DC to join (24 sts)
ROUND 3: CH 2, 2DC in same st and around. sl st to 1st DC to join (48 sts)
ROUND 4-11: CH 2, DC in each stitch around. Sl st to 1st DC to join (48 sts)
ROUND 12-13:CH 1,HDC in each stitch around.Sl st to 1st HDC to join (48 ) ROUND 14-16:CH 1,SC in each stitch around.Sl st to 1st SC to join (48 sts)

Fasten off. Weave ends.

Wasn’t that pretty Quick AND cute. Add a dash of “Chic” to your wardrobe with this easy crochet slouchy cap. I’ll definitely be making a few more of these.

Posted in Uncategorized | 2 Comments

Knitting Pattern: 6 Stitch Offset Parallel Cable


The Offset Parallel cable uses the very basic cable stitch. But just a slight twist in the normal scheme of knitting creates a distinctive cable pattern that has a bold look on your fabric.

As a panel, it has a great bold look and yet it can easily be inserted into other designs with a plain Reverse Stockinette Stitch background for great effect.

It would work well on sweaters, winter hats, wraps, shawls, scarves and blankets.

Stitch Details

Skill Level- Intermediate

Number of Rows: 11

Pattern Repeat- Multiple of 17sts+4

Materials Used

Yarn: J.Sagar Sunbeam Bri Acro in yellow. 

Wraps per Inch: 12 wpi

Needles: US7

Gauge: 20sts and 22 rows to 4″

Abbreviations

K- Knit

P- Purl

C6F- Cable 6Front  

Slip next 3 stitches on a cable needle and hold at the front of work.  Knit next 3 stitches from left hand needle. Then knit the stitches from the cable needle.

C6B- Cable 6Back

Slip next 3 stitches on a cable needle and hold at the back of work. Knit next 3 stitches from left hand needle. Then knit the stitches from the cable needle.

Pattern Instructions

Cast On: Multiple of 17 stitches+4

Row 1: (right side) *P4, K6, P1, K6. Repeat from * across until the last 4 stitches. P4

Row 2: K4, *P6, K1, P6, K4. Repeat from * to end.

Row 3: Repeat Row 1.

Row 4: Repeat Row 2

Row 5: P4,C6B, P1, K6. Repeat from * to the last 4 stitches. P4

Row 6: Repeat Row 2

Row 7: Repeat Row 1.

Row 8: Repeat Row 2

Row 9: Repeat Row 1

Row 10: Repeat Row 2

Row 11: P4, K6, P1, C6F. Repeat from * to the last 4 stitches. P4

Repeat rows 1-11 until you have reached your desired length.

Posted in Uncategorized | Tagged , , , , | 1 Comment

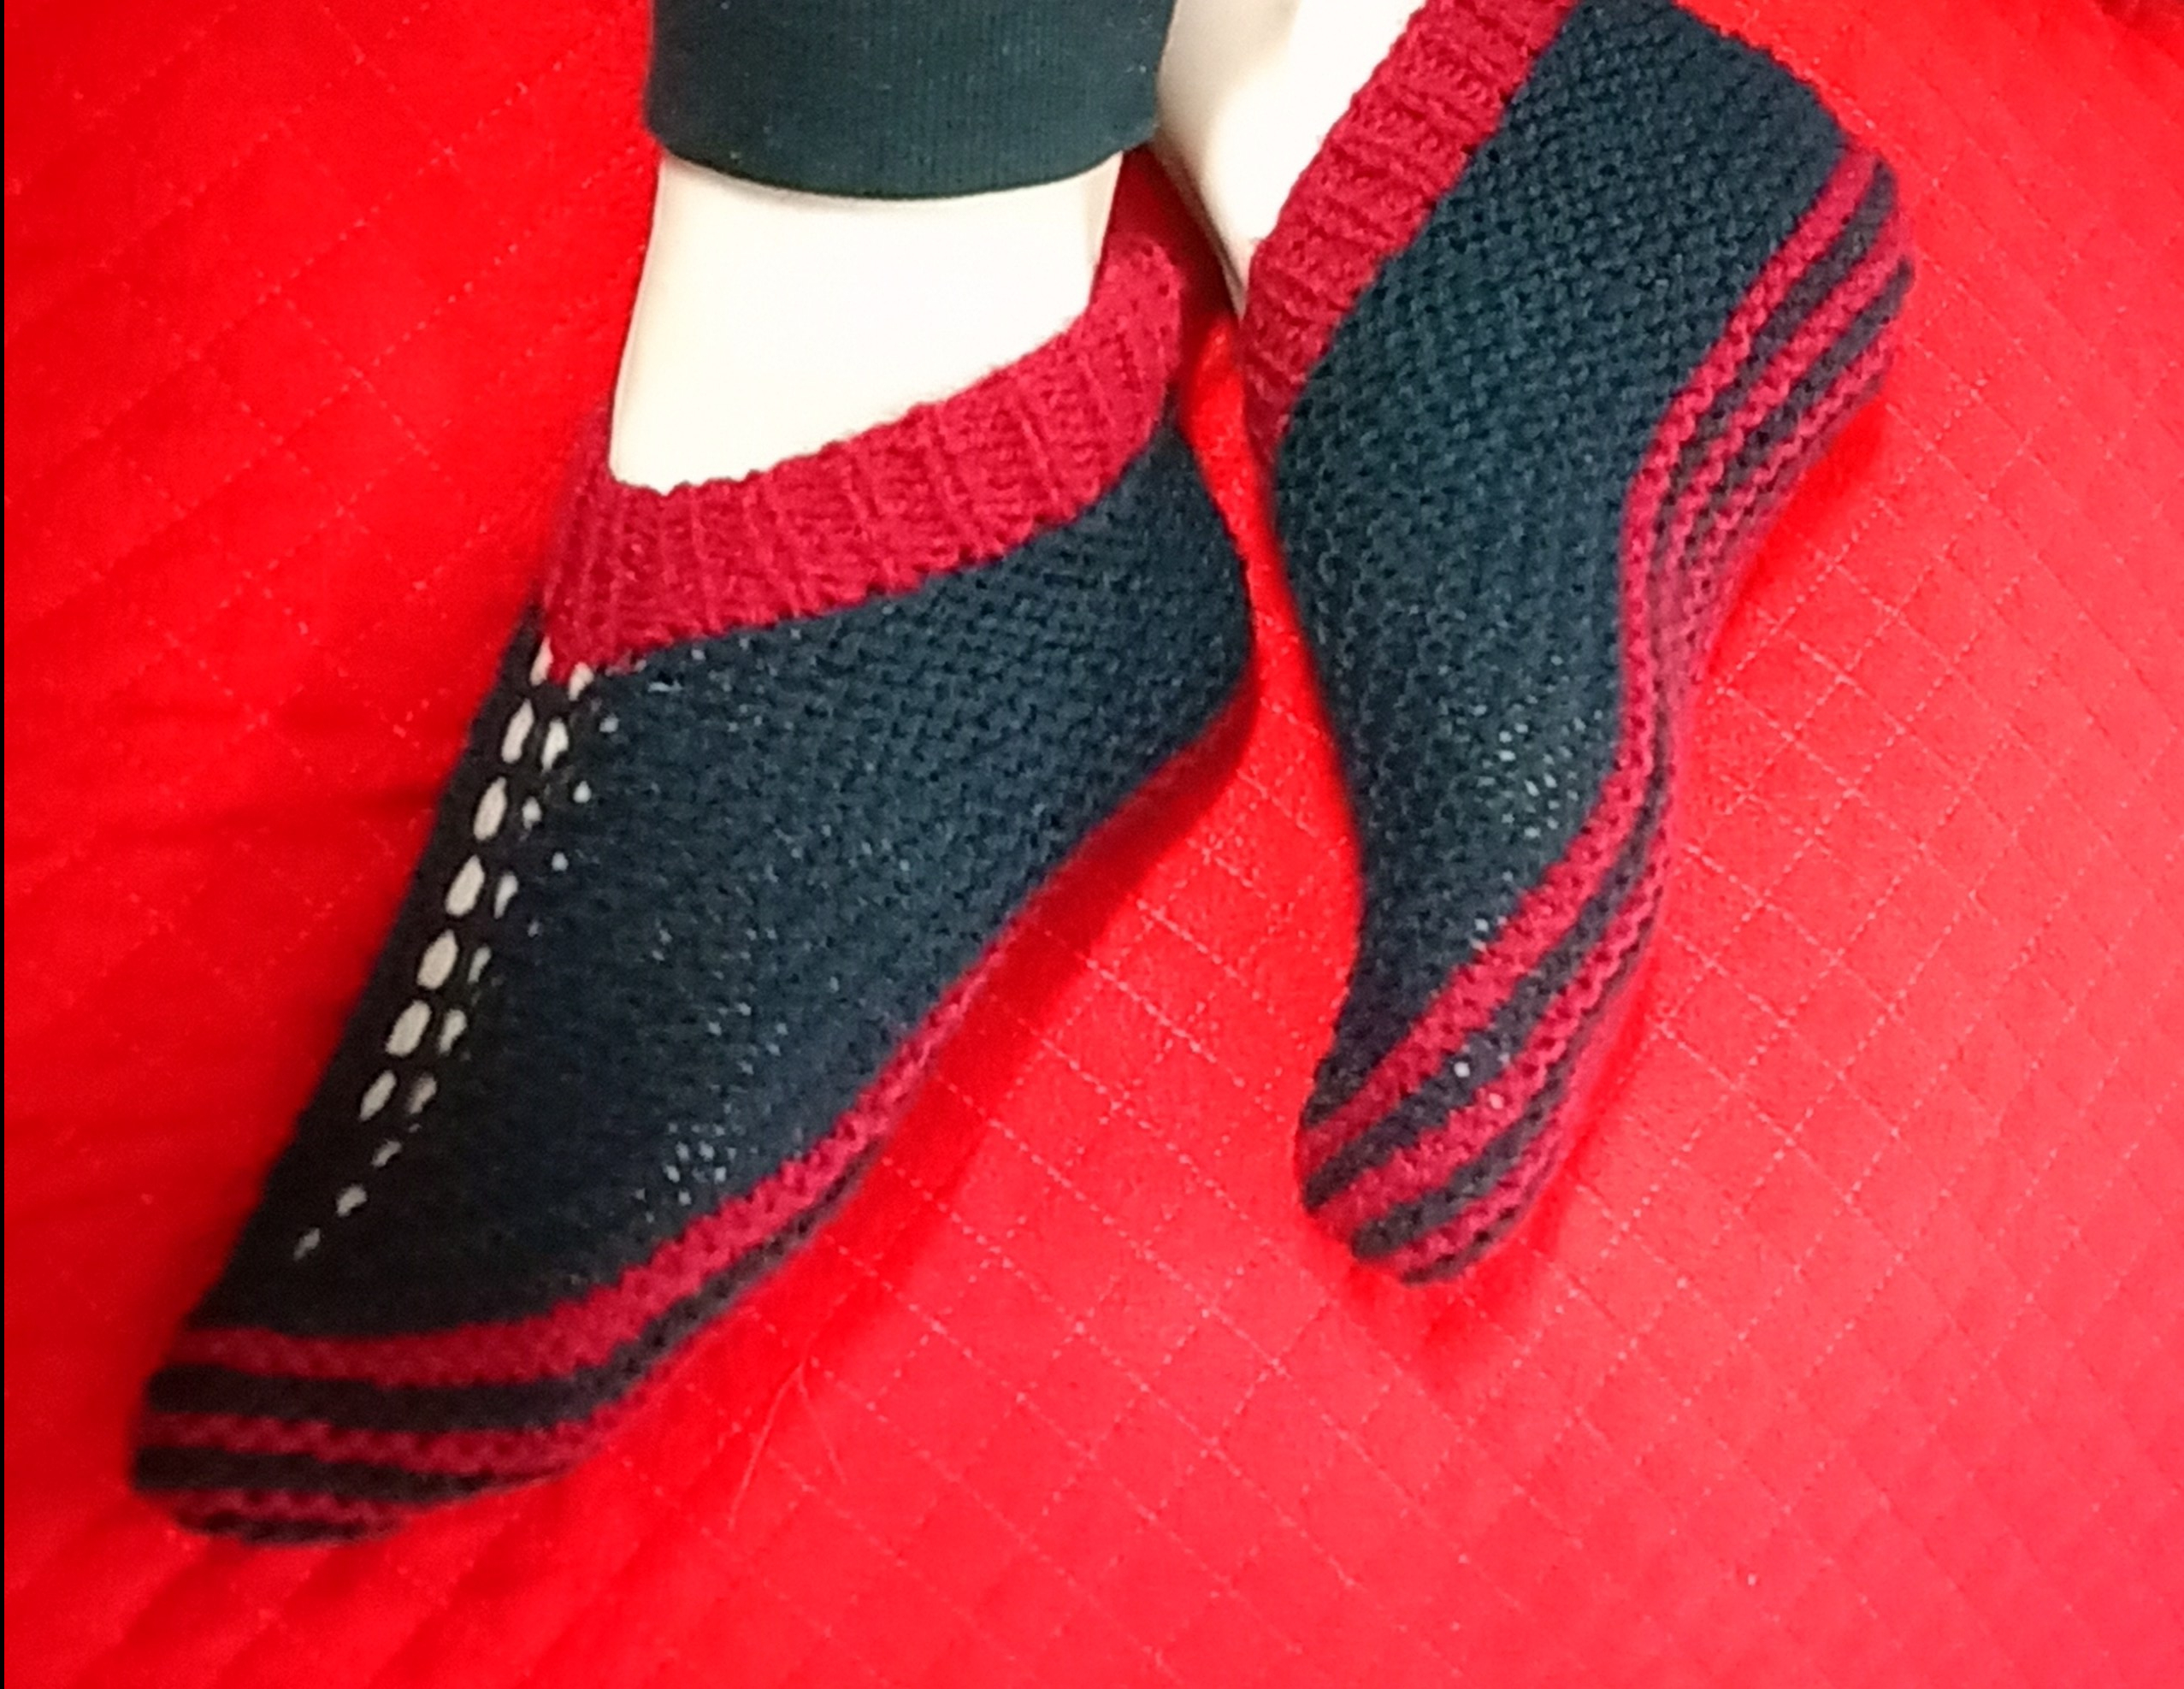
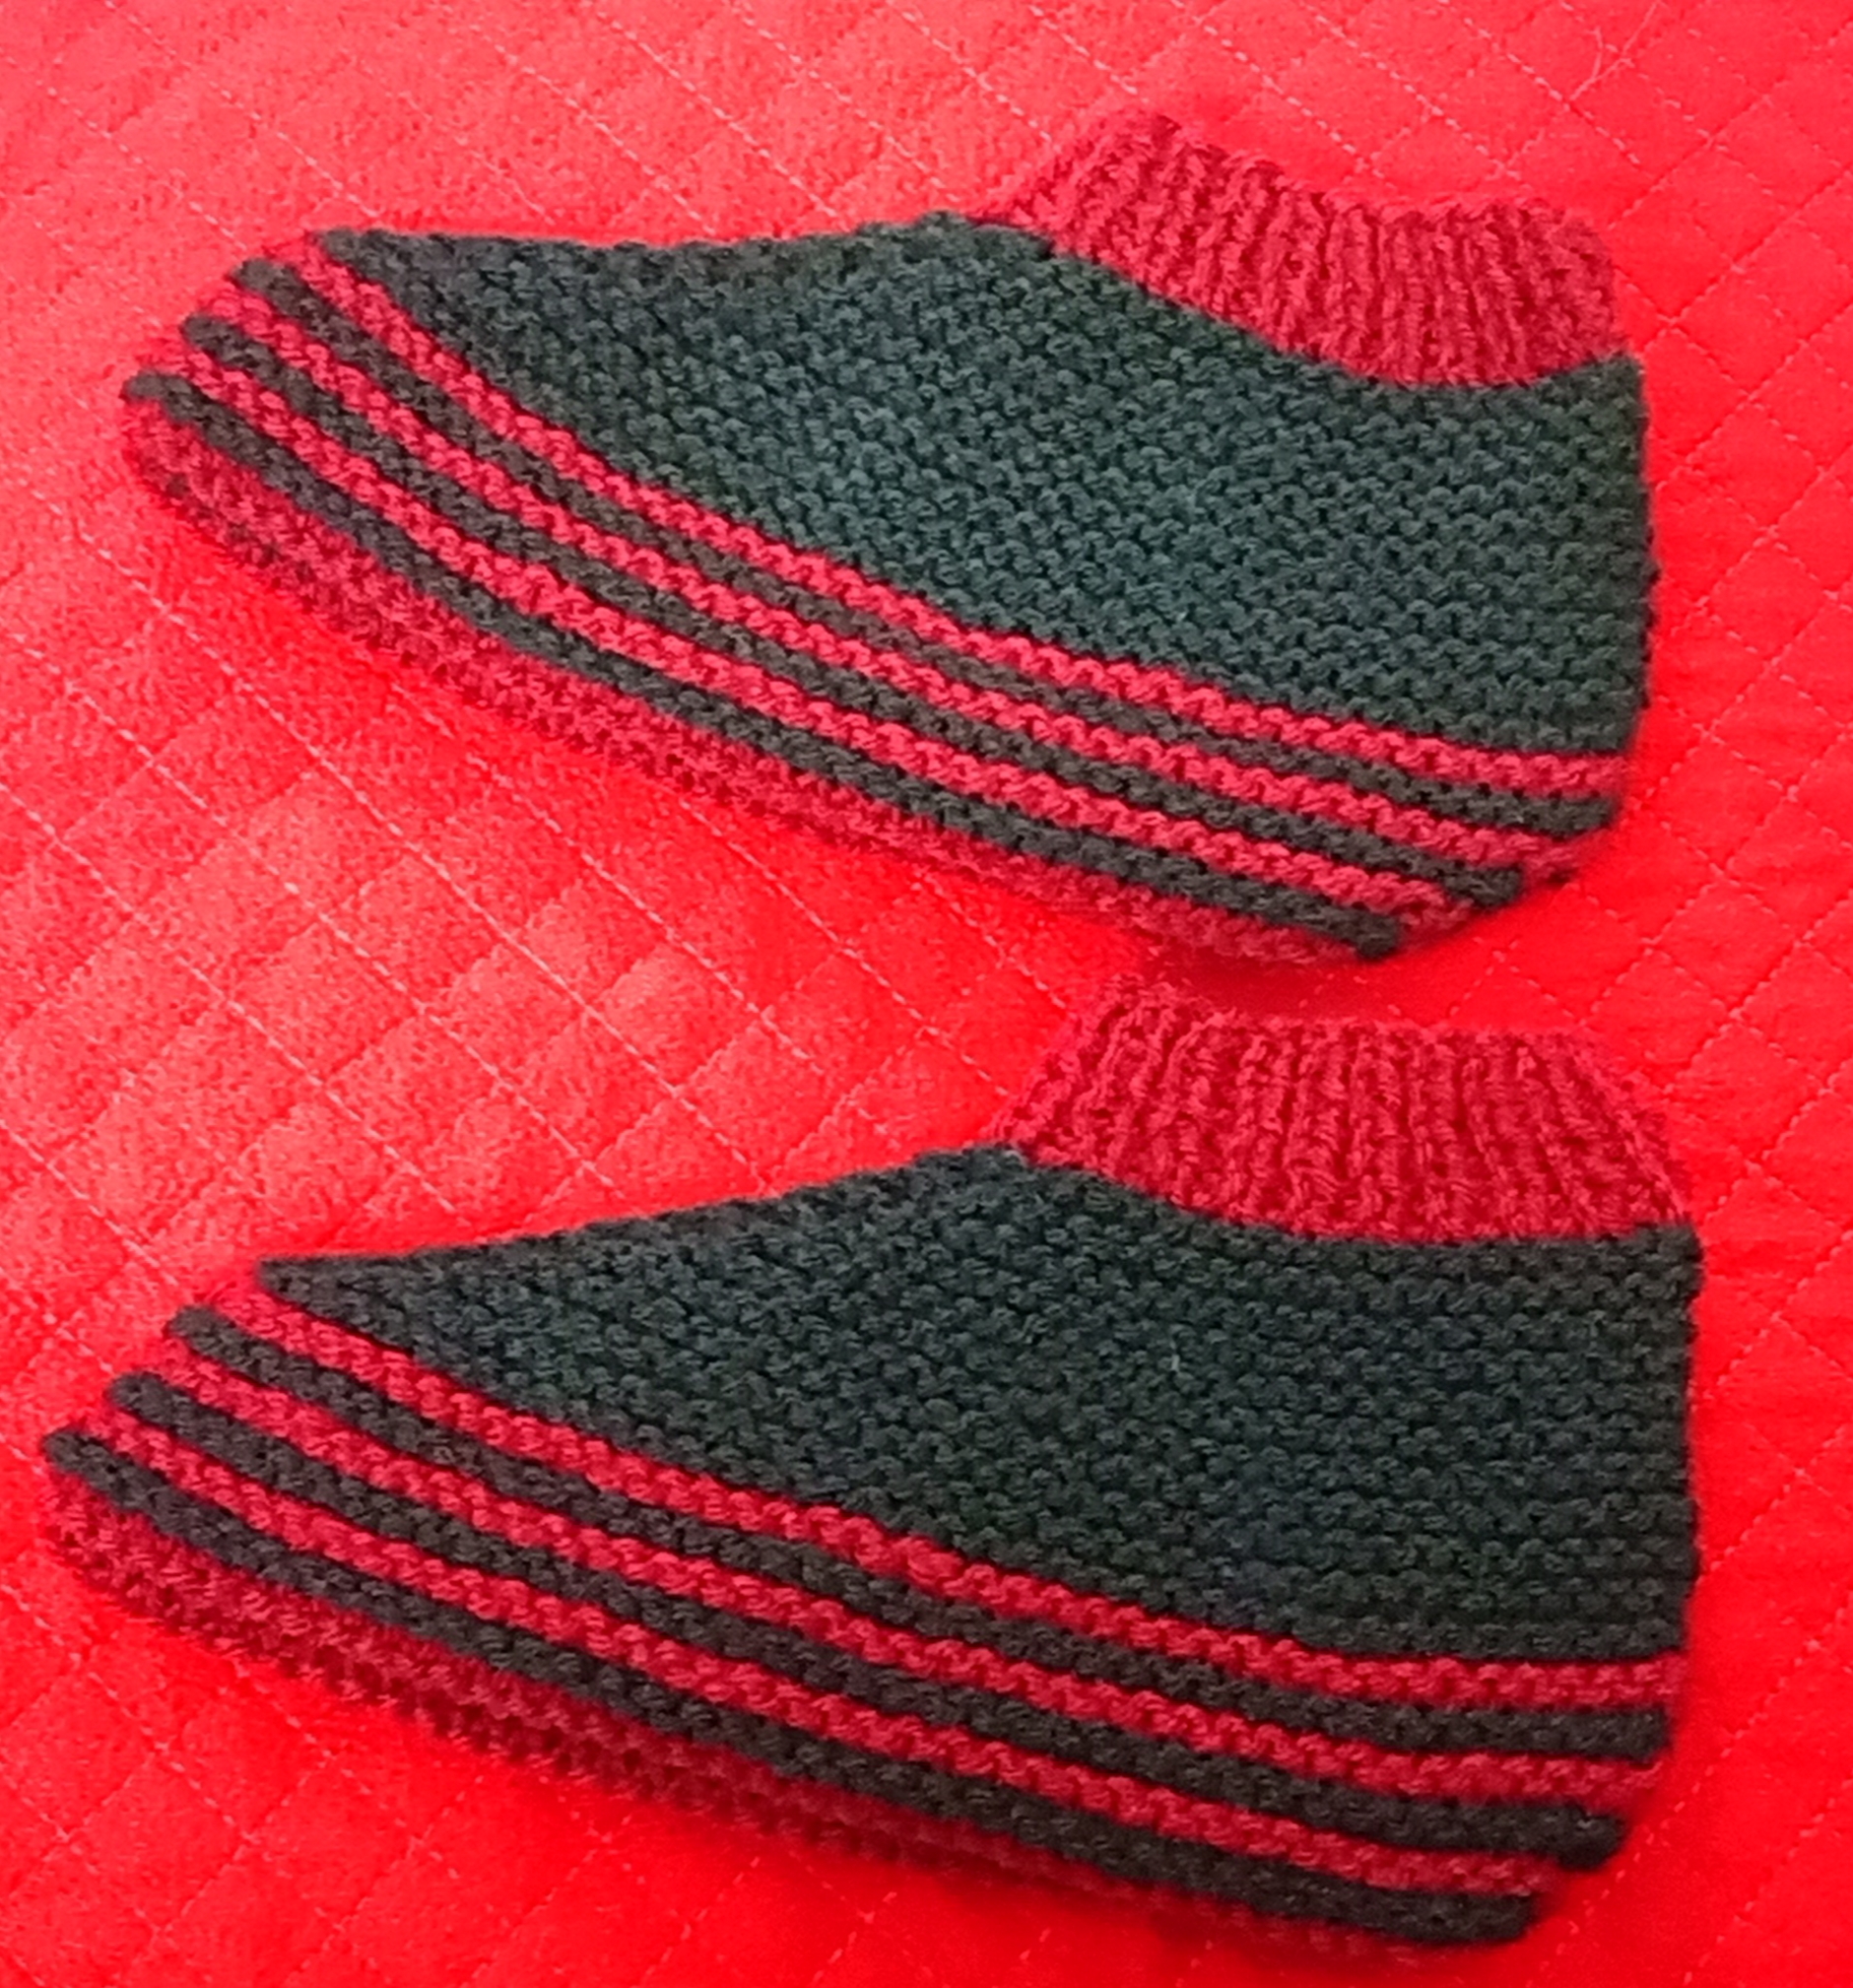
COZY TOES BOOTIES- FREE PATTERN

img_20181202_141800.jpg


These simple slippers are so versatile!

These are also, possibly, the easiest slippers I have ever found. These booties have kept my families toes cozy since time immemorial. I have been churning out this particular pattern for myself as well as for other members in my family for years.

Every non-knitter I know, typically wants a pair of these booties.

And every knitter I know wants the pattern.

Not easy, if not outright impossible to cater to the demands of the non-knitters.

But knitters, I am happy to oblige. So, here is the pattern. Good luck stopping after just one pair. 

IMG_20181202_135044.jpg

MATERIALS

 
YARN: 100 meters/ 110 yards/25 gms Fingering weight yarn

If you want to knit in two colours, the approximate yardage would be as follows:

Main Colour MC- 40 meters/20 grams approximately and Contrasting colour CC- 12 metrrs/5 grams approximately. 

The yarn used in the sample is:
MC: Black-2 balls Ganga Acrowool Baby Pearls #29
CC: Maroon-1 ball J. Sagar Bri Acro  #29

NEEDLES 

  • Knitting needles: One pair 3.5 mm or UK size 9. If you opt for a 3 needle BO, you will an additional needle in either the same size or one size larger. We do not need stretchy bind off for this pattern.
  • Tapestry needle: one for seaming and weaving the ends.

FINISHED SIZE: 

Teenager/women size.One size fits most adults. But easily adaptable. Size can be adjusted by changing either yarn weight or needle size.  

ABBREVIATIONS

  • K: Knit
  • P: Purl
  • YO: yarn over (increase 1 stitch)
  • KFB: Knit in the front and back of the stitch (increase 1 stitch)
  • K2tog: Knit 2 stitches together (decrease 1 stitch)


IMG_20181202_133304.jpg

PATTERN

CUFF

Using CC, cast on 41 stitches.

Row 1: K1, *P1, K1. Repeat from * to end.

Row 2: P1, *K1, P1. Repeat from * to end.

Repeat Rows 1 and 2, 3 more times to get a total of 8 rows of rib. This will give you a short cuff which will barely reach your ankles. If you wish a higher cuff, You can continue in the rib pattern for as many rows as it suits you.  

FOOT

Change to MC.

Row 1: K19, KFB, YO, K1, YO, KFB, K19. (45 stitches)

Row 2 and all even rows: K all stitches.

Row 3: K21, KFB, YO, K1, YO, KFB, K21. (49 stitches)

Row 5: K23, KFB, YO, K1, YO, KFB, K23. (53 stitches)

Row 7: K25, KFB, YO, K1, YO, KFB, K25. (57 stitches)

Row 9: K27, KFB, YO, K1, YO, KFB, K27. (61 stitches)

Row 11: K29, KFB, YO, K1, YO, KFB, K29. (65 stitches)

Row 13: K31, KFB, YO, K1, YO, KFB, K31. (69 stitches)

Row 15: K33, KFB, YO, K1, YO, KFB, K33. (73 stitches)

Row 17: K35, KFB, YO, K1, YO, KFB, K35. (77 stitches)

Row 19: K37, KFB, YO, K1, YO, KFB, K37. (81 stitches)

Row 21: K39, KFB, YO, K1, YO, KFB, K39. (85 stitches)

SOLE

Row 23-24: Using CC, K all stitches.

Row 25-26: Using MC, K all stitches

Row 27-28: Using CC, K2tog, K to end. (83 stitches)

Row 29-30 Using MC, K2tog, K to end. (81 stitches)

Row 31-32: Using CC, K2tog, K to end. (79 stitches)

Row 33-34: Using MC, K2tog, K to end. (77 stitches)

Row 35-36: Using CC, K2tog, K to end. (75 stitches)

Row 37: using MC, K2tog,  K 36 stitches to the center of the work. You will have 37 stitches on the left hand needle and 37 on the right hand needle.  Fold the work such that the right side of the work is facing each other and wrong side is facing out. The two needles are lined up parallel to each other such that both points are facing the same direction.

3 NEEDLE BIND OFF

STEP 1: K together through the front leg of the first stitch on both needles.

STEP 2: Repeat with the second stitch on both needles. Now there are 2 stitches on the Right hand needle.

STEP 3: Pull the 1st stitch over the 2nd stitch to bind off

STEP 4: Knit together through the front legs of the next stitches on both needles again and bind off. Repeat this until all stitches are bound off.

FINISHING UP

Sew up the seam at the back of the heel. Wet to flatten out and leave to dry.


Posted in Free Knitting Patterns, Knitting | 12 Comments

Spiderman Themed Ripple Blanket

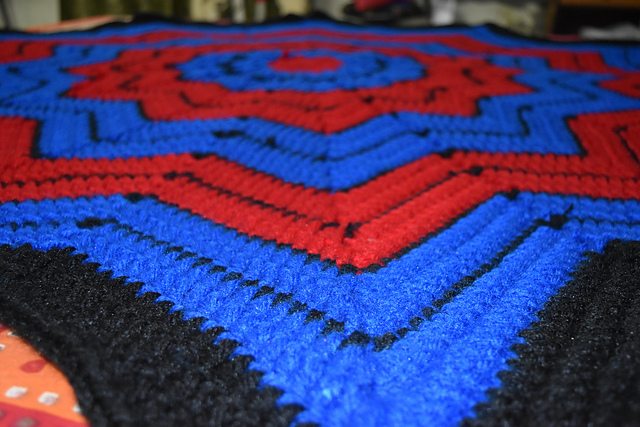
I have crocheted this Spiderman themed blanket for my 9 year old nephew.

All he wanted was a Spiderman costume.

Over the years, I have kept up a steady supply of costumes of various characters for him as he is ever fond of dressing up. Starting with a assortment of costumes of mythological characters- Hanuman, Shiv, Ram- we moved on to some characters inspired by TV and movies like Harry Potter, Doremon and Chakravartin Samrat Ashok. I have knit a Griffindor House scarf to go with the Harry Potter costume. One costume he was particularly fond of was Netaji Subhash Chandra Bose. Most of these costumes were procured from the famous Kinari Bazzar, Chandni Chowk. But now, as the demands become more and more specific, I moved on to Raj Fancy Dresses, Rani Bagh who supplied the customized dresses that I needed

Now coming around to present. For the last few months, he has taken a fancy of Spiderman. This costume was procured easily enough from Raj Fancy Dresses.

But this time I was thrilled because this particular demand gives me a chance to crochet a Spiderman themed Afghan to accompany his costume. Yayyy!!!😊😊😊

Recently, I had discovered that Balaji Wool House at Lajpatnagar stocks Super Bulky yarn. Spiderman blanket gave me the perfect opportunity to try out this yarn.Yayyy again!!!! ☺☺☺☺

So, off I went yarn shopping and one week later, this afghan was ready for dispatch to a very eager kid waiting expectantly for the costume. Yayyy once again!!! 😂😂😂


MATERIALS

YARN: Super Bulky yarn 6 wpi

Red-600 gms, Blue-900 gms, Black-900gms
HOOK: 10 mm
GAUGE: 6 stitches or 9 rows in 4 inches or 10 cm
FINISHED SIZE: 75 Inches across from peak to peak

ABBREVIATIONS

CH- Chain Stitch

DC- Double Crochet

SC- Single Crochet

st/ sts- stitch/ stitches

sl st: Slip stitch

PATTERN

SET UP ROUNDS
With RED

CH 4. Join with Sl st to form a ring.

ROUND 1: CH3, 11DC in the round. Join with sl st to the top of beginning CH 3. (12 sts)

ROUND 2: CH3, 1DC in same stitch. 2DC in each st around. Join with sl st to the top of beginning CH 3. (24 sts)
JoinBLACK

ROUND 3: CH1 [ Skip next st, (1 SC, CH2, 1 SC) in next st] Repeat around. End with SC in the base of starting CH1, CH2, Join with sl st into the top of beginning CH1 (48 sts)
Join BLUE

Join Blue in CH 2 sp.

ROUND 4: . (CH 3, 1 DC, CH2, 2 DC) in CH 2 sp. [(2DC, CH 2, 2 DC) in next CH 2 sp]. Repeat. Join with sl st to top of beginning CH 3. (72 sts)

ROUND 5: Sl st into next CH 2 sp. CH 3 [(2DC, CH2, 2DC) in CH 2 sp, 1 DC in next st. Skip next 2 st. 1 DC in next st.] Repeat. Join with sl st to top of beginning CH 3. (96 sts)
Join BLACK

ROUND 6: CH 2, 1 SC in next st, [(1 SC, CH 2, 1 SC) in next CH 2 sp. 1 SC in next 2 sts. Skip next 2 sts. 1 SC in next 2 sts.] Repeat. End with skip 2 sts. Join with sl st into the top of beginning CH1 (96 sts)
Join BLUE

ROUND 7: CH 3, !DC in the next st. [(2 DC, CH 2, 2 DC) in next CH2 sp. 1 DC in next 2 sts. Skip 2 sts. 1 DC in next 3 sts. Repeat. Ending with skip 2 sts. Join with sl st to top of beginning CH 3. (120 sts)

ROUND 8: Sl st into next st. CH 3, 1 DC into 2 sts. [(2 DC, CH2, 2 DC) 1 DC in next 3 sts. Skip 2 sts. 1 DC in next 4 sts. Repeat. Ending with skip 2 sts. Join with sl st to top of beginning CH 3. (144 sts)


Continue in the above set up. The colour scheme that I followed was as follows:
Red-2 Rounds, Black-1 Round
Blue-2 Rounds, Black-1 Round, Blue-2 Round, Black-1 Round
Red-2 Rounds, Black-1 Round, Red-2 Round, Black-1 Round

Continue in this scheme of alternating red and blue bands until you get 3 bands of Blue. End with 3 rounds of Black to create a border.
PLEASE NOTE

For all Black Rounds: (1 SC, CH 2, 1 SC) in CH 2 sp.

For all Red and Blue Rounds: (2DC, CH 2, 2 DC) in CH 2 sp.

Posted in Crochet, Free Knitting Patterns | Tagged , , , , , , , | 21 Comments

Hufflepuff Scarf – in the round


Last year, I had hatched a plan to use  my daughter’s Pottermania to lure my daughter into knitting.

I started a scarf simple enough for a beginner which was basically just a tube knit in rounds entirely  in stockinette stitch. In the end, it so turned out that I ended up knitting up about 80% of the scarf with Shreeya contributing a few rows as and when she could.

But it was a fun altogether and both of us enjoyed the process. On hindsight, I have to acknowledge that knitting this scarf was so much fun for ME that I ended up knitting more than I intended to.

Mea Culpa.

In my own excitement, I did not give my daughter sufficient opportunity to knit the scarf. 😉

So, I offer the pattern of this scarf here. If not my daughter, then this pattern might prove useful to some other beginner. Or maybe like me, some other experienced knitter in need for  a pattern for some mindless knitting might make use of these notes.

Only thing a bit tricky in this pattern is knitting stripes. To get jogless stripes while knitting in the round, followed the trick of slipping the first stitch of the color change round. I found this trick here. And I suggest that you too, should practice this technique before starting this scarf to get a truly  seamless finish.

 Materials

Yarn : Fingering weight or 4ply yarn.  

I have used Ganga Acro Baby Pearls (8 balls 25 gm each)

Main color (MC):       Yellow 150 grams  6 balls Shade #63

Contrast color (CC):  Black  50 gms  2 balls Shade #29

 Needles:3.25 mm 16 inches circular

 Hook :to add fringe

 Finished size:

72 inches by 8 inches +4  inches fringe

Pattern 

Cast on 80 stitches in MC

Knit in rounds. Follow the color scheme given below to create the Trapped band pattern.

 MC 42 rows

CC 6 rows

MC 8 rows

CC 6 rows

Repeat these 62 rows as per your preference of the length of the scarf

Knit MC 42 rows to end.

Cast off and add fringe to the scarf to finish off.

Posted in Free Knitting Patterns, Knitting | Tagged , , , , , , , , , , , | Leave a comment

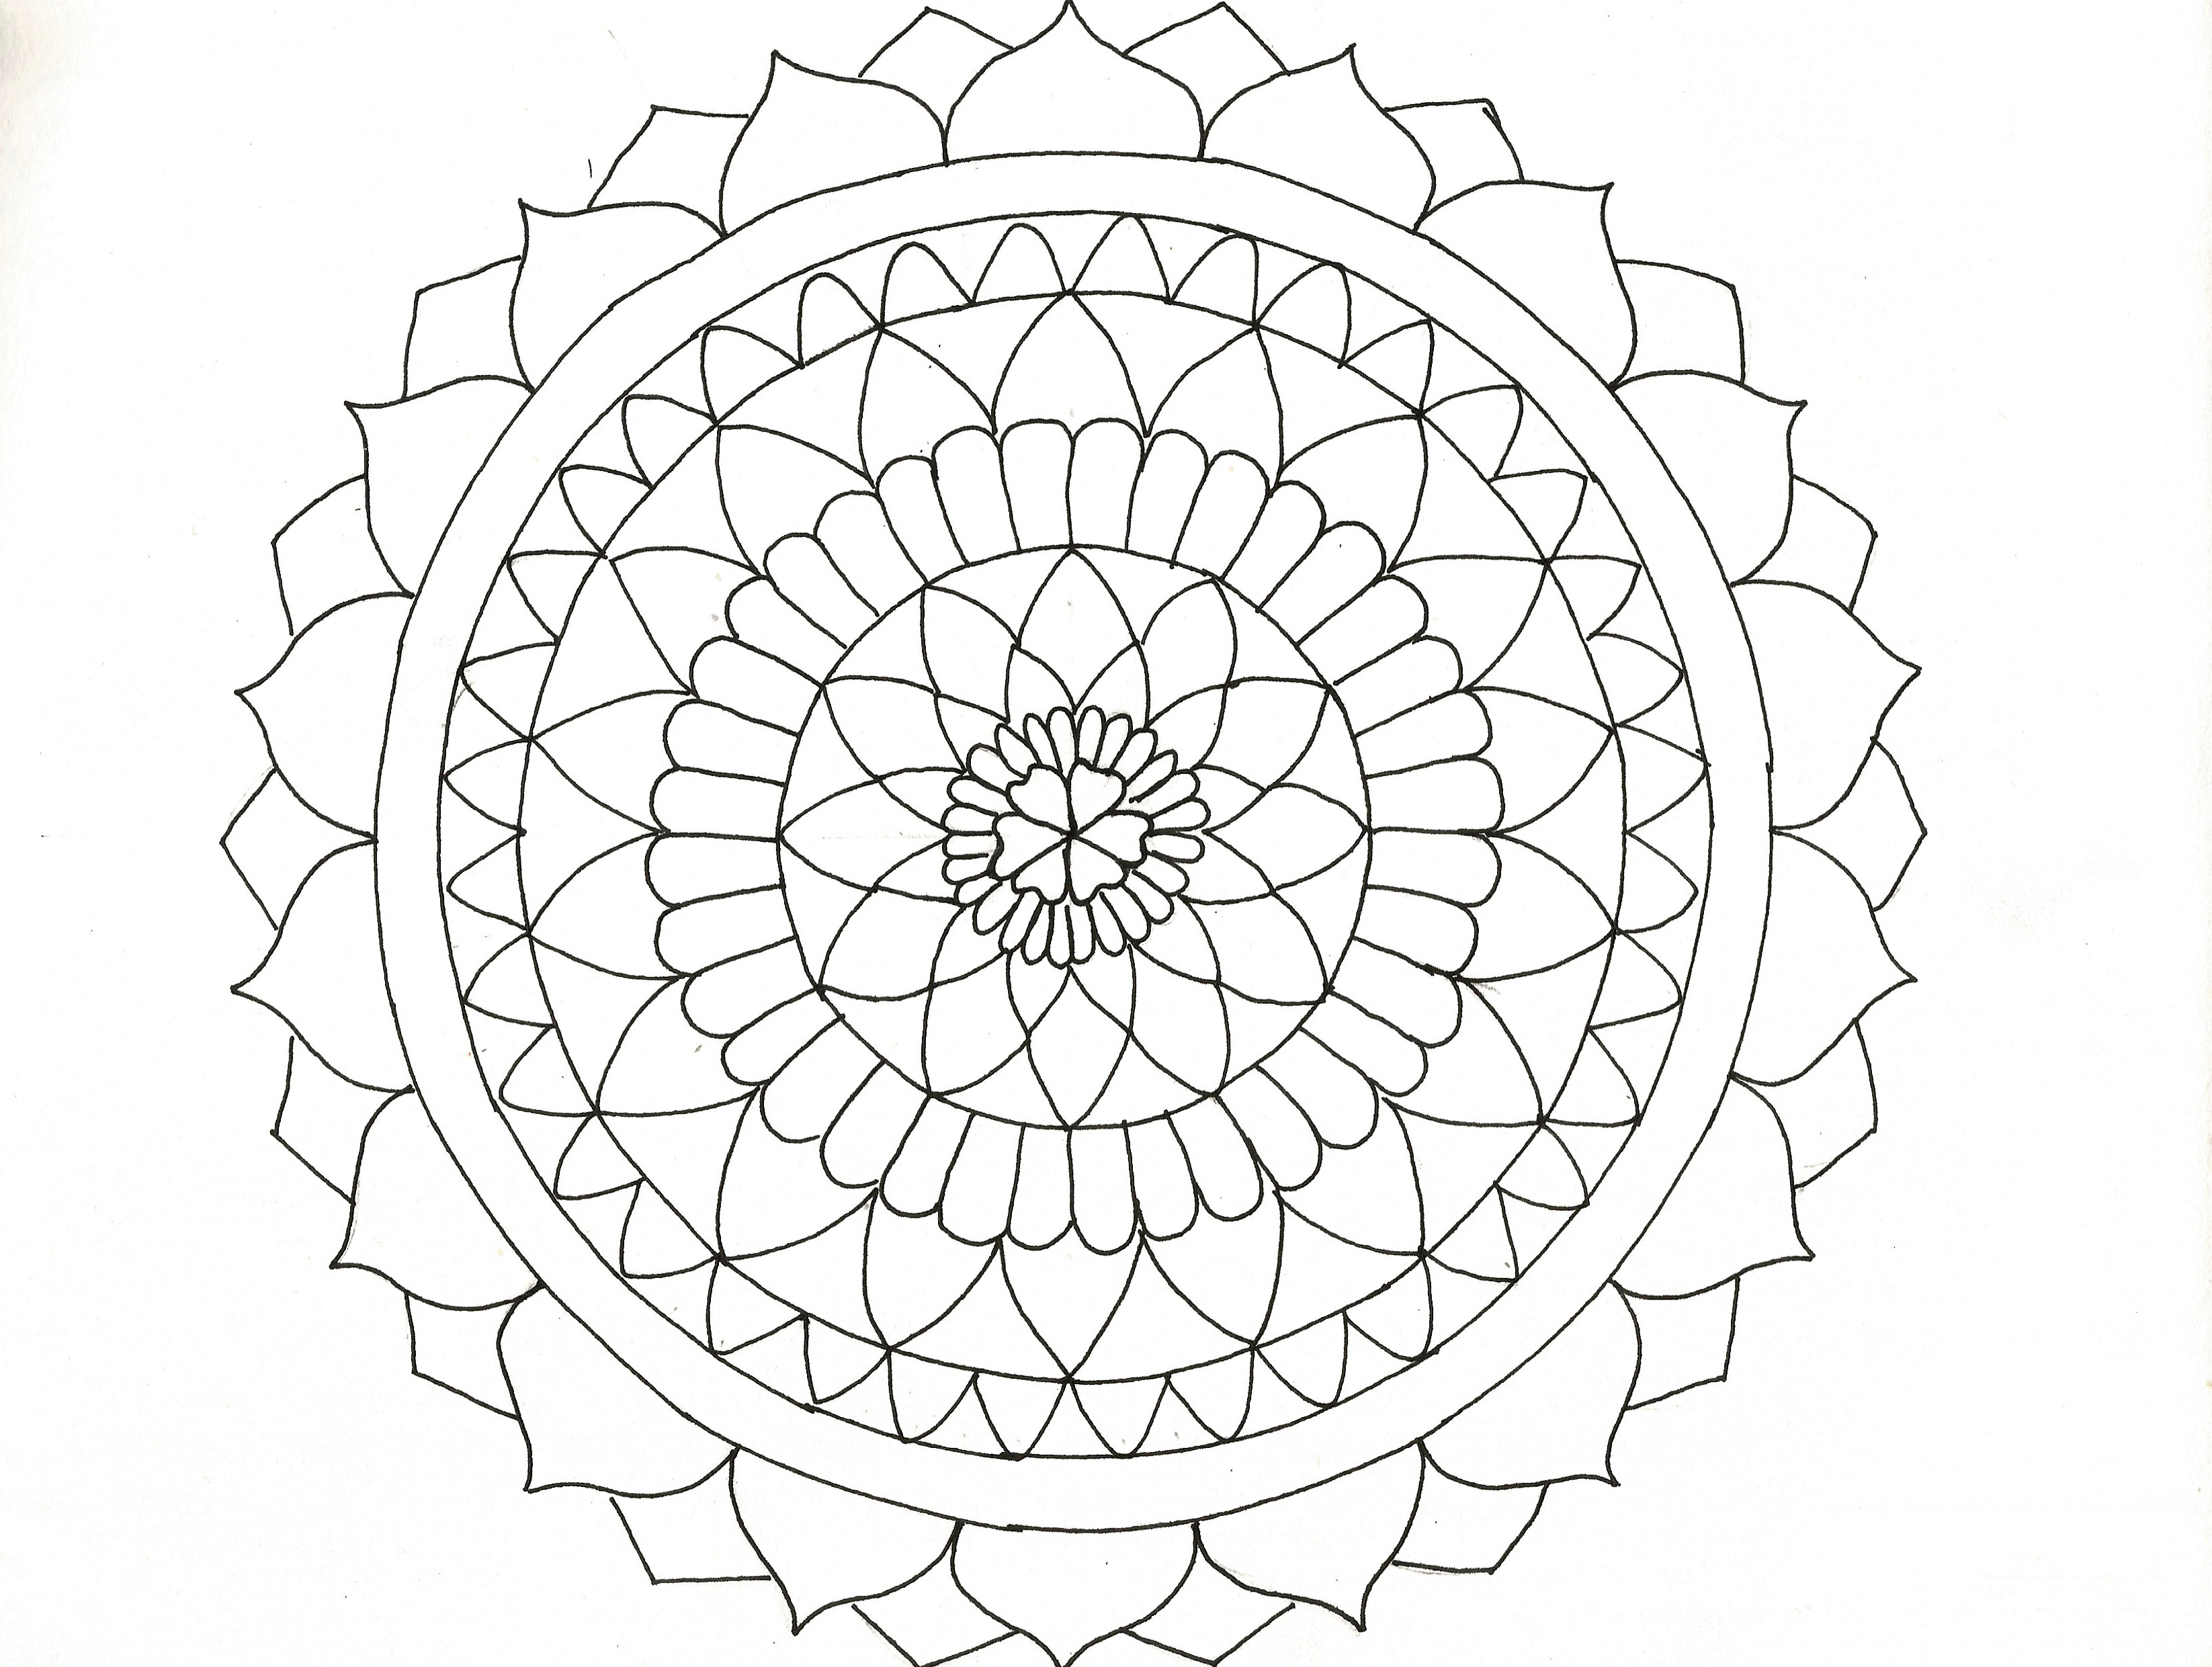
Mandala coloring Pages-Free Download

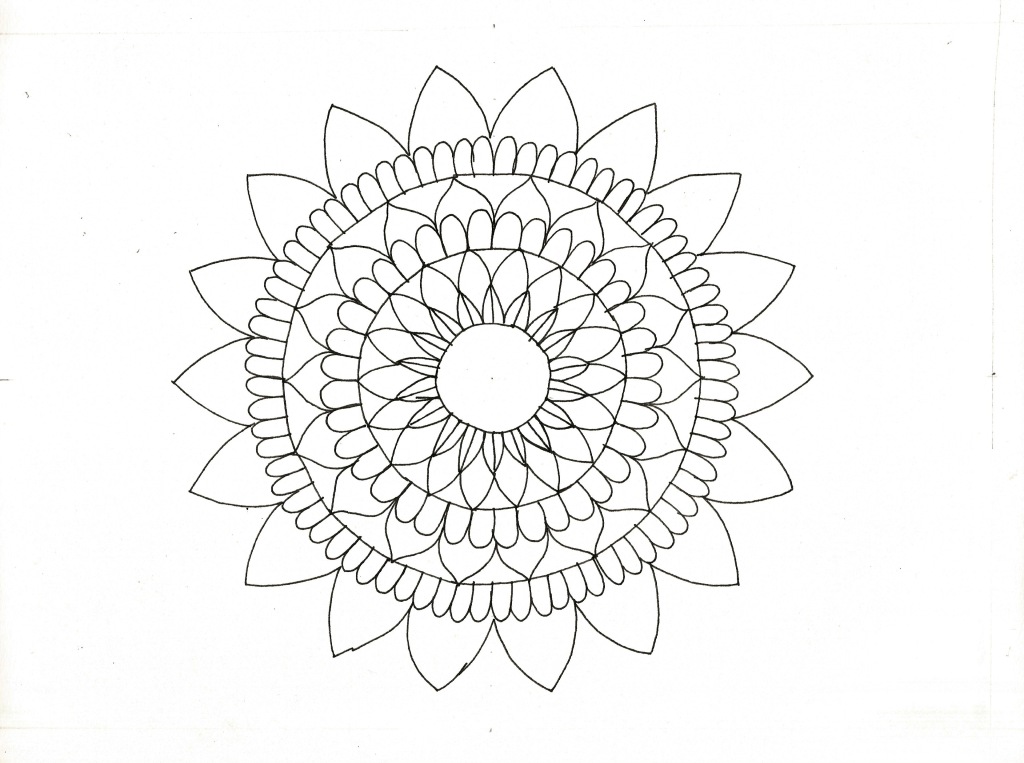
Today, I want to share with you two Mandala coloring pages. Click on the link below the images to download the PDF files of these images. Feel free to print and colour them

untitled-11-copy


Download Mandala #1


Download Mandala #2
untitled-10-copy

Posted in Free Download, Uncategorized | Tagged , , , , , , , , , | Leave a comment

Mandala Colouring Pages on My Etsy Shop

Whenever I have wanted to create Art, I find myself drawn to mandalas. Pun intended 🙂

So it was no surprise that during #Inktober2017 , I found myself drawing mandalas once again. I was required to post a piece of art everyday.  And since I cannot devote more than a couple of hours per day to Art, I decided to create a Mandala Coloring Page every day instead of completed Mandalas.

A Few of these Coloring Pages are listed now at my Etsy shop

Do check out if you are interested and share feed back.

Some free patterns are also available right here on this blog.


Posted in Drawing, Etsy, Uncategorized | Tagged , , , , , , , , | Leave a comment

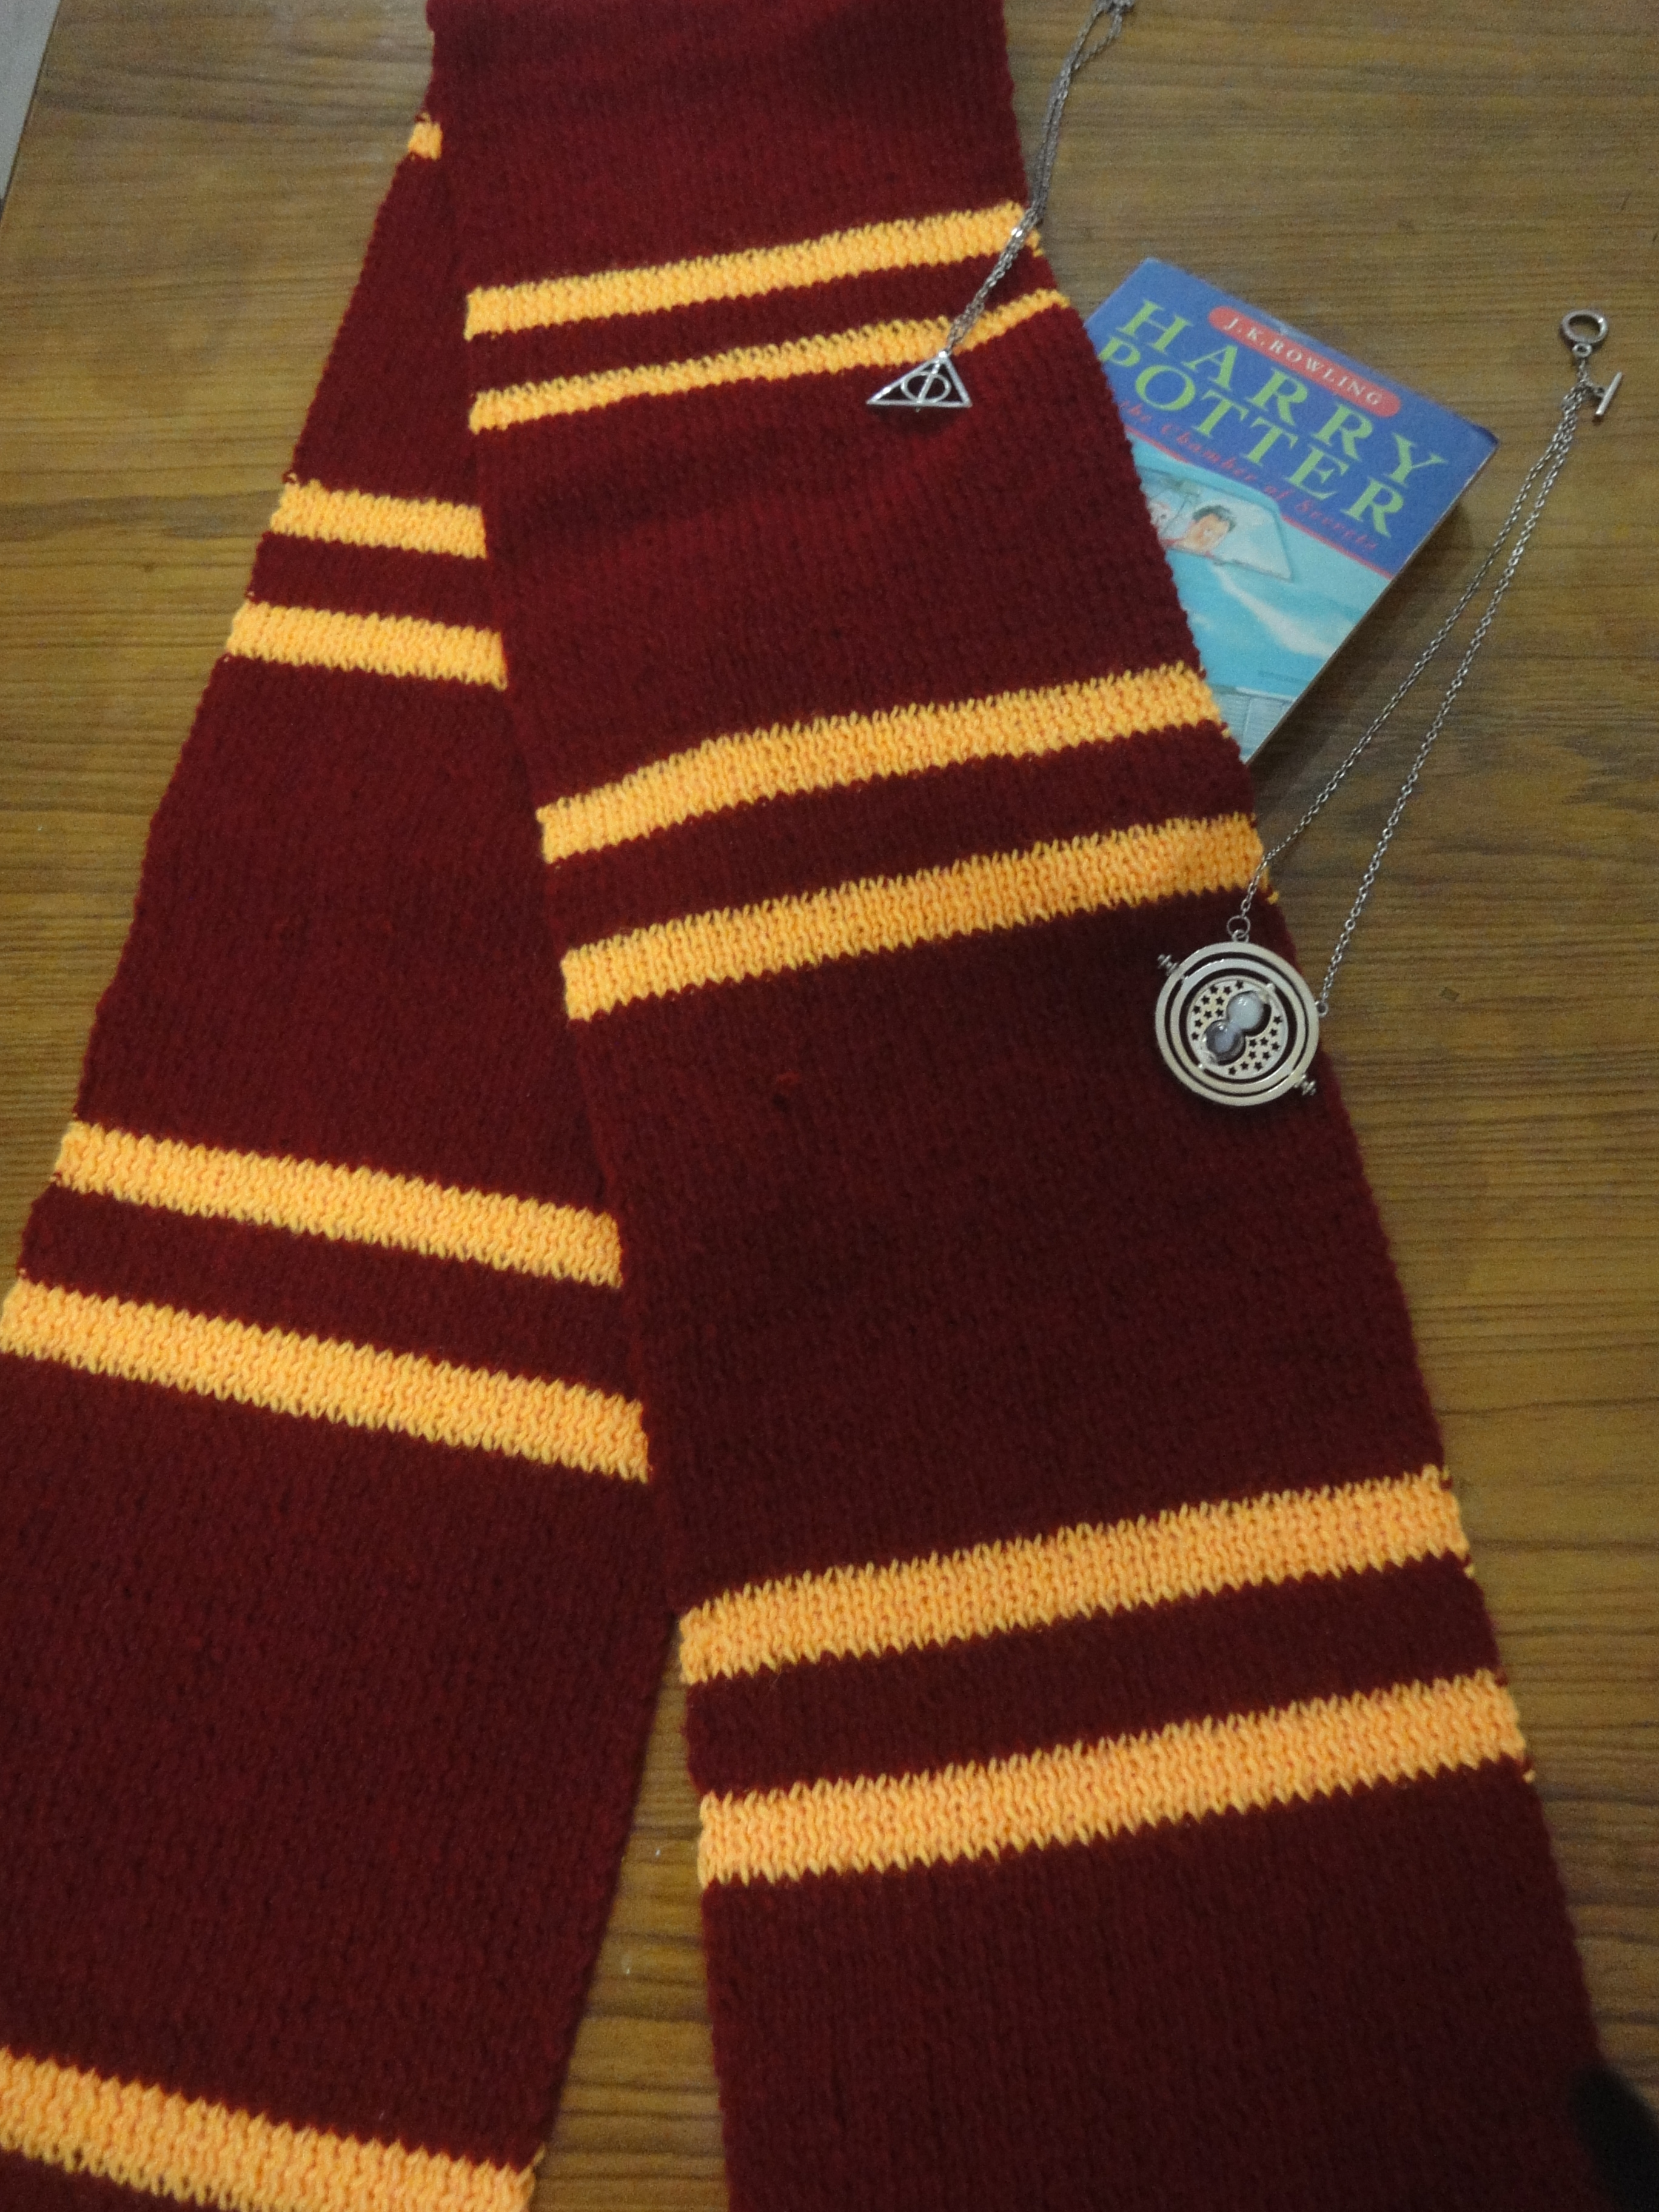
GRYFFINDOR HOUSE SCARF PATTERN


dsc08301


If you can knit a rectangle in rib and change colors, you can easily show off your Harry Potter Fandom with pride!

I knit as  many as three Harry Potter scarves this year. They make me very very happy, because not only do they knit up real quick , but they also make wonderful gifts, not only for teens and kids, but to all Harry Potter nerds of any age. And my universe seems to have a plentiful supply of the same.

In case your universe,  too, is composed of a generous supply of the same, you would wish to knit one of these. I have knit here a Gryffindor house scarf. But, I would love to knit the other house scarves as well in the future.

But, at present, here is the pattern for Gryffindor Scarf. Remember, you can easily adapt this pattern by using the appropriate House colours


Materials

Yarn : Fingering weight or 4ply yarn.  I have used J.Sagar Bri Acro (10 balls 25 gm each)

Main color (MC):       Deep red 200 grams  8 balls Shade #29 

Contrast color (CC):  Gold  50 gms  2 balls Shade #36

 Needles:3.25 mm 16 inches circular

 Hook :to add fringe

 Finished size:72 inches by 8 inches +4  inches fringe

Pattern 

Cast on 72 stitches in MC

knit in 1×1 rib.

Follow the color scheme given below to create the Trapped band pattern.

 MC 42 rows

CC 6 rows

MC 8 rows

CC 6 rows

Repeat these 62 rows as per your preference of the length of the scarf

Knit MC 42 rows to end.

Cast off and add fringe to the scarf to finish off.

Posted in Free Knitting Patterns, Knitting | Tagged , , , , , | 2 Comments